
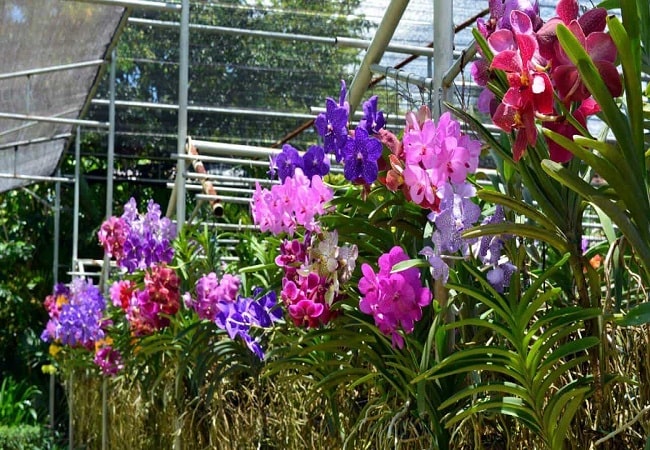
Orchids are one of the most popular flower types in the world. They come in a variety of colors and shapes. You can find them in many places, including homes, gardens, and office buildings. Orchid question and answer?
Despite their popularity, there is still a lot of mystery surrounding these plants. Whether you’re a beginner or an expert, there’s a lot you need to know about orchids!
In this Q&A mega blog post, I’ll cover everything from growing orchids to choosing the right plant for your needs. So whether you’re curious about orchids or just want to get started, read on for all the information you need!
Quick Navigation
- 1 Propagation Orchid Question and Answer
- 1.1 How to grow orchids from cutting?
- 1.2 Where To Cut Orchid Stem?
- 1.3 How To Cut Orchid Stem?
- 1.4 Clean The Cutting Area
- 1.5 Soak The Cutting in Water
- 1.6 Prepare The Soil For Planting The Orchid Cutting
- 1.7 Plant in a New Pot
- 1.8 Water and Fertilize
- 1.9 Prune When Necessary
- 1.10 When to Prune Orchid?
- 1.11 How to propagate jewel orchids?
- 1.12 Growth Season to propagate jewel orchid
- 1.13 How to Propagate Jewel Orchid from Stem Cutting?
- 1.14 How to Propagate Jewel Orchid from Rooting Hormone?
- 1.15 How To Propagate A Jewel Orchid From A Leaf Nodes?
- 1.16 How To Propagate A Jewel Orchid With Seeds?
- 1.17 How to Propagate Jewel Orchid via Division?
- 2 10 Simple Steps To Grow A Hong Kong Orchid Tree From Seed
- 3 What Are Some Of The Challenges Of Growing Orchids In Hong Kong?
- 4 Orchid Care
- 5 How to Take Care of a Mystique Orchid
- 5.1 Choose the Right Location
- 5.2 Choose the Right Soil
- 5.3 Choose the Right Orchid Pot
- 5.4 Water the Plant
- 5.5 Prune the Plant
- 5.6 Remove Old Leaves
- 5.7 Repot the Plant
- 5.8 Provide Proper Sun and Shade
- 5.9 Temperature and Humidity
- 5.10 Clean Your Orchid Cases Regularly
- 5.11 How to properly care for an orchid to prevent root rot?
- 6 Some Common Problems
- 6.1 What are some common problems with orchids in winter?
- 6.2 Why do orchid leaves turn yellow?
- 6.3 Exposure To Low Or High Temperatures
- 6.4 Exposure To Direct Sunlight
- 6.5 High Levels Of Fertilizers Or Pesticides In The Soil
- 6.6 Low Levels Of Oxygen In The Soil
- 6.7 Overwatering Can Lead to Yellowing Leaves
- 6.8 Underwatering Can Lead to Yellowing Leaves
- 6.9 Too Much or Too Little Light
- 6.10 The Natural Death Of Old Foliage On The Plant
- 6.11 A Sudden Change In The Environment
- 6.12 Fungal or Bacterial Infections
- 6.13 Nutrient Deficiencies
- 6.14 Humidity Levels
- 6.15 Root Rot
- 6.16 Exposure To Hard Water Or Chemicals
- 6.17 Potting Stress
- 6.18 Pest Problems
- 6.19 What Are the common problems with your waterfall Orchid?
- 6.20 How do I know if my orchid has aphids
- 6.21 Why does mold grow on orchid roots?
- 6.22 What Are the Signs of a Pest or Disease Affecting your Mystique Orchid?
- 6.23 Why is my orchid flower spike turning yellow?
- 6.24 8 Causes For Spike In Yellow Orchid Flowers
- 6.25 10 Most Common causes why orchids won’t grow stems
- 6.26 Why is my orchid stem turning yellow?
- 6.27 12 Potential causes for orchid Stems to Turn Yellow
- 7 Revive Guide
- 7.1 How To Revive Orchid Leaves?
- 7.2 How to Revive an Orchid with wrinkled leaves?
- 7.3 How To Fix Sunburned Orchid Leaves?
- 7.4 How do you revive wilted orchid leaves?
- 7.5 How to Revive an Orchid with Limp Leaves?
- 7.6 How to fix leathery orchid leaves?
- 7.7 How to Revive an Orchid with Curly Leaves?
- 7.8 How to Revive Orchid Leaves with Brown Tips?
- 7.9 How to Revive Orchid Leaves that Drop Off?
- 7.10 How to Revive Orchid with Mottled Appearance of the Leaves?
- 7.11 How to revive an orchid without leaves?
- 7.12 How to save an orchid with root rot?
- 7.13 5 Ways To Save An Orchid With Root Rot
- 7.14 10 Best Ways To Remove Mold From Orchid Roots Safely And Effectively
- 7.15 How to Prevent Orchid Leaves from Turning Yellow?
- 7.16 Make sure the soil is well-drained
- 7.17 Water the orchid only when the soil is dry
- 7.18 Avoid overhead watering
- 7.19 Fertilize monthly with a balanced fertilizer that contains nitrogen and phosphorus
- 7.20 Prune off dead or damaged leaves
- 7.21 Protect the orchid from wind and cold weather
- 7.22 Do not over-fertilize or over-water the orchid
- 7.23 Remove mealybugs and other pests by hand
- 7.24 Check the orchid for pests every week or so
- 7.25 How to Fix an orchid flower spike turning yellow?
- 7.26 5 Troubleshooting Tips To Help Your Orchid Grow A Strong Stem
- 7.27 How Do You Fix Yellow Orchid Stems?
- 7.28 How Do You Get Rid Of Aphids On Orchids?
- 7.29 Applying insecticidal soap
- 7.30 Apply neem oil or horticultural oil
- 7.31 Use a strong stream of water
- 7.32 Remove them by hand
- 7.33 Destroy aphid eggs
- 7.34 Use yellow sticky traps
- 7.35 Prune away infested leaves and stems
- 7.36 Rotate your crops to avoid planting aphids
- 8 Conclusion
Propagation Orchid Question and Answer
How to grow orchids from cutting?
You can grow orchids easily from cuttings, and with a little effort, you can grow beautiful orchids in your garden.
Choose an Orchid Cutting
Choosing the right orchid cutting can be intimidating, but it doesn’t have to be. There are a few things to keep in mind when choosing an orchid cutting:
- The type of orchid you’re planning to grow. Different types of orchids prefer different types of cuts. For example, some orchids like strongly scented cuts, while others like more subtle versions.
- The condition of the orchid stem. Older stems usually need more time to heal than younger stems, so consider this when selecting your cut.
- The size and shape of the cut you’re going for. You’ll want to ensure the cut is big enough to accommodate the root ball and shaped correctly so water can easily reach the orchid’s roots.
Once you’ve selected your orchid cutting, it’s time to prepare it for planting.
Where To Cut Orchid Stem?
The best place to cut an orchid stem is just below a node. A node is a small, raised area on the stem where leaves or roots grow. Use a sharp knife or pair of scissors when making your cut.
After making your cut, you can either pot your orchid cutting immediately or let it heal for a few days. If you let it heal, place the cutting in a shady spot and keep it moist.
How To Cut Orchid Stem?
- Make a small slit near one end to cut the stem. Be careful not to cut into the root ball, or your orchid will die.
- Carefully twist the knife around the end of the stem and pull it away from the root ball. Be careful not to damage any of the plant’s roots while cutting.
Clean The Cutting Area
- Clean the cutting area with a sterile solution or alcohol. Wipe it down with a cloth and dry it off.
- Make a small hole in the bottom of the potting medium using a pencil or chopstick. Make sure to enlarge the hole as much as possible before inserting your cutting tool.
- Push the tool down into the potting medium and twist it until you reach the stem. Cut off just above where you found the stem, careful not to damage any surrounding roots or leaves.
Soak The Cutting in Water
If you want to grow an orchid from a cutting, the first step is to soak the cutting in water. This will help soften the tissue to be easily transferred to the soil. You can either place the cutting in a bowl of water or place it in a bag and seal it tightly. Let the cuttings soak for anywhere from 30 minutes to overnight, depending on how big the cutting is.
Prepare The Soil For Planting The Orchid Cutting
To grow an orchid from a cutting, you’ll need to prepare the soil first. Make a mixture of one part potting soil and one part sand. Mix it well and fill your planting hole halfway with the soil. Orchid cuttings will not root in water, so ensure the water nearby is kept dry. Once the soil is prepared, plant your orchid cutting into it. Be sure to root-prune the cutting back regularly, so it doesn’t get too dense and bushy.
Plant in a New Pot
Once you have prepared the soil and added your cutting, it is time to plant it in a new pot. Ensure that the pot has good drainage and is large enough to accommodate the rootball and the cutting. You can either use a potting mix or fill half the pot with soil and add water until it reaches an inch below the top of your cuttings. Place your cuttings in position and gently press them into the soil.
Water and Fertilize
Once your orchid is planted, you need to water and fertilize it. Give your orchid plenty of water, especially during dry times, and fertilize it with a high-nitrogen fertilizer every two weeks.
Keep the Plant Warm and Dry
You can do a few things to help keep your orchid warm and dry during the growing process. One is to keep the plant in a warm, bright location. Another is to ensure it stays dry by holding the potting mix moist but not wet or using a desiccant such as silica gel.
Prune When Necessary
It is generally recommended that you prune your orchids every two to three years. This will help maintain the plant’s size, shape, and overall appearance. If a stem becomes too long, it can be cut off with a sharp knife at the base. It is also important to prune off dead branches or leaves that may block light and airflow to the plant’s roots.
When to Prune Orchid?
When to prune an orchid depends on the growing conditions. Still, generally speaking, you should prune orchids in the early spring, when new growth begins. If your orchid is in a container, you may need to remove old flower spikes and add new ones every year to keep it looking healthy.
How to propagate jewel orchids?
Propagating jewel orchids is relatively easy with a few simple steps. The most important thing to remember is to keep the root ball moist and to place the plant in a bright, warm location.
Select healthy tissue with plenty of roots if you plant from a cutting. You can also grow orchids from stem cuttings taken during the dormant season. Be sure to use fresh, sterilized cuttings that have been well soaked in water for at least 24 hours before planting.
The jewel orchid is a genus of terrestrial orchids that belongs to the Orchid family. They are native to Central and South America, growing in humid forests. The jewel orchid is a hardy plant that can tolerate low light levels and dry conditions.
To propagate jewel orchids, you will need:
- A rooting hormone
- A pot with good drainage
- Strong stem cuttings are taken from a healthy stem about two inches long
- Watering mix (half sand, half soil)
- A plastic bag
Growth Season to propagate jewel orchid
The jewel orchid is a difficult plant to propagate and can take several months to germinate. The best time to start propagation in early spring, when the new growth begins. You will need a rooting hormone, fresh cuttings, and a growing medium to propagate jewel orchids.
How to Propagate Jewel Orchid from Stem Cutting?
You will need a stem cutting from a healthy orchid plant to propagate jewel orchids. Cut the stem about 1 inch below a leaf node and carefully remove any leaves and roots. Stick the cutting into moist soil and water it well. After three to four weeks, you should see new growth on the cutting. Keep the soil moist and transfer the plant to a pot when new growth is two inches long.
How to Propagate Jewel Orchid from Rooting Hormone?
You can also propagate jewel orchids using rooting hormone if you don’t have any stem cuttings. Follow the same stem-cut instructions, but use rooting hormone instead of soil and water.
How To Propagate A Jewel Orchid From A Leaf Nodes?
There are a few different ways to propagate jewel orchids from leaf nodes. One method is to take a leaf node, cut off the top, and then insert the stem of another jewel orchid into the cut end. Ensure that the two plants are well-matched in size, as mismatched leaves can lead to weak stems.
Another method is to take a leaf node, break it off near the base, and insert another jewel orchid’s stem into the broken end. Again, ensure the two plants are well-matched in size, as mismatched leaves can lead to weak stems.
Finally, you can also take a leaf node and cut it half lengthwise, then remove each half, so there is just a stem left. Insert this stem into a deep pot filled with fresh soil and water until roots form.
How To Propagate A Jewel Orchid With Seeds?
To propagate a jewel orchid, you must purchase some jewel orchid seeds. You can find these online or at garden centers. Next, you need to soak the seeds in water for 24 hours. After soaking, you must plant the seeds in the soil and water them regularly.
Keep an eye on the seedlings and transplant them into new pots when they are large enough. Once the plants have rooted and grown, you can repot them into their container and enjoy your newly propagated jewel orchid!
How to Propagate Jewel Orchid via Division?
The jewel orchid is a beautiful plant that you can propagate by division. Place one rooted stem in a pot filled with fresh soil and water. Make sure the soil is moist but not soggy.
Gently break off the stem near the ground, leaving at least two roots attached to the new stem section. Plant the newly divided root section in fresh soil and water. Repeat these steps for each desired plant if you want to propagate more than one jewel orchid.
10 Simple Steps To Grow A Hong Kong Orchid Tree From Seed
If you’re looking to grow a hong kong orchid tree from seed, there are a few things you’ll need to do to ensure success. Here are ten steps that will help you get started:
- Choose The Right Hong Kong Orchid: Choose the right variety of hong kong orchids. There are about 30 different varieties of phalaenopsis orchids available, so be sure to choose one that you are interested in growing. Some popular varieties include the Tahitian sunset and the ivory queen.
- Choose The Right Planting Site: Make sure the area you choose for your tree is well-drained and has plenty of sunlight. Hitting these two points will help ensure your orchid tree is healthy and thriving.
- Buy A Good Quality Seed Kit:The best kits will have everything you need to germinate the seeds, including peat moss, potting mix, sterilized water, and soil mix labeled with plant information. Ensure the kit is from a reputable source and has been tested for germination success before purchase.
- Get Your Seedlings Ready To Plant: Once you’ve chosen your planting site, it’s time to gather your materials. You’ll need some potting soil, sand, and fresh hong kong orchid seeds (you can find these at most garden centers). You should label each container with the plant’s name and date to track its progress over time.
- Soak the Seeds: overnight in water mixed with equal parts of sterile distilled water before planting them into moistened soil in your prepared potting container. Make sure to label each seedling with its respective planting date and location so you can track their progress over time.
- Plant The Seeds And Protect Them From The Weather: Once everything is ready, it’s time to plant! Start by evenly distributing the seeds across the top of the soil in a container, then cover them with more soil using a spoon or your hands. Be sure to water them well before you leave them to germinate.
- Watering and Fertilizing: Keep the plant well-watered and fertilize it with a balanced orchid fertilizer every 2-3 weeks during the early growth phase.
- Keep an Eye on Your Seedlings: Once they’ve started to grow, it’s important to keep an eye on them. They will need plenty of water, sunlight, wind, and cold weather protection. If things start to go wrong, take note of the symptoms so you can address them immediately.
- Pruning The Hong Kong Orchid Tree: Closely and pinch off any branches that grow too tall or require pruning. Before removing any branches, it is best to wait until the tree is at least 8-10 inches tall.
- Plant More Trees as They Grow: When your tree is about two feet tall, it’s time to plant another one! Be sure to stake the new tree before planting the seeds, then water and care for it just as you would the first tree.
What Are Some Of The Challenges Of Growing Orchids In Hong Kong?
Growing orchids in Hong Kong can be a rewarding experience, but you must face several challenges. Some of these challenges include a limited growing season, humidity levels that can be high in the summer months, and difficulty in finding quality orchid seeds. Despite these challenges, those with the determination and willingness to overcome them can grow orchids successfully in Hong Kong.
- Timing: The Hong Kong growing season is short, lasting from late February to early May. This means that orchid plants must be transplanted and hardened off for the winter months before beginning growth again in the spring.
- Humidity: The high humidity levels in Hong Kong can be a major challenge for orchid growers. Mold and fungus can thrive in an environment that is too wet, while too little humidity will result in poor growth and slow blooming.
- Quality Orchid Seed: It cannot be easy to find quality orchid seeds in Hong Kong, particularly if you are looking for species not commonly cultivated here, such as the hong kong orchid.
- Space: Orchids require a lot of space to grow well, so it is important to plan your garden carefully before growing orchids.
How to Grow a black orchid?
Here, some tips on how to grow a black orchid successfully may include:
- Choose a type of black orchid suited to your area’s climate.
- Provide the orchid with plenty of bright, indirect light.
- Keep the orchid’s potting mix moist but not soggy.
- Feed the orchid with a balanced fertilizer designed for orchids.
- Water the orchid with lukewarm water.
- Repot the orchid every one to two years, using a pot slightly larger than the previous one.
Orchid Care
What are the basics of orchid care?
Orchids are one of the most popular houseplants. For a good reason: they’re beautiful, long-lasting, and relatively easy to care for. Here are the basics of orchid care to help you keep your plant healthy and looking its best.
Most orchids prefer bright, indirect light. Too much sun can scorch their leaves, while too little will prevent them from blooming. If your orchid is not getting enough light, you may see fewer flowers and leaves that are yellowish or pale green.
Water your orchid once a week, taking care not to overwater it. Orchids like their roots to dry out between watering. Be sure to use room-temperature water; cold water can shock the plant and cause its flowers to drop.
Orchid fertilizer is optional, but if you’d like to boost your plant, you can use a diluted orchid fertilizer every other week.
How do you take care of a jewel orchid?
Orchids are a beautiful addition to any home, and the jewel orchid is no exception. These delicate flowers are native to Southeast Asia and prefer warm, humid conditions. To propagate jewel orchids, you must care for the plant’s soil and water needs. You should keep the plant in a sunny location and root it in fresh potting soil every year. Ensure to water the plant regularly, and fertilize it monthly with a high-quality grower when appropriate.
Water requirements
To propagate a jewel orchid, you will need to provide sunlight light and about one and a half inches of water per week. If you live in an area with very hot summers, you may need to water your orchid more often. It’s important to ensure the potting mix is always moist but not soggy. Over-watering can lead to problems such as root rot.
Sunlight Requirements
Jewel orchids require a lot of sunlight to thrive. Full sun exposure is best, but they can tolerate some partial sun if filtered through a window. Place the orchid in a location that receives at least six hours of direct sunlight. If you live in a cool climate, you may need to supplement light with artificial light during winter.
Get well-draining soil
To propagate jewel orchids, you need well-draining soil that is acidic, moist, and has good drainage. You will also need to provide your orchid with light and regular water. Prepare the soil before you plant your orchid by mixing in compost and some organic matter. You can also purchase pre-mixed soil for orchids.
Save Them from Pest Attack
An orchid is a beautiful and delicate flower often associated with luxury. However, these plants are quite fragile and can be easily damaged by pests. If you have an orchid, it is important to take care of it to prevent pest infestations.
One way to protect your orchid from pests is to keep it away from areas where insects or other pests are likely to be found. This means keeping it out of gardens or other areas with a lot of vegetation. If you must put your orchid in a garden, keep it in a pot so that it is not in direct contact with the ground.
Another way to keep pests away from your orchid is to regularly inspect it for signs of infestation. Look for insects or larvae on the leaves or in the soil. If you see any pests, remove them immediately and treat the plant with an insecticide or fungicide.
By taking these simple steps, you can help to keep your orchid healthy and free from pests.
5 Easy Tips For Creating The Perfect Black Orchid
Here are five tips to help you create the perfect black orchid:
- Ensure the plant is healthy before starting any gardening project: A healthy plant can withstand changes in conditions, such as increased humidity or light exposure. However, if the plant is not healthy, it may not survive transplanting or growing in a new location.
- Choose a location with good light and humidity levels: Black orchids prefer medium to high light levels and moderate humidity levels. If your home does not have these conditions, consider moving your black orchid to a location that does have them available. Alternatively, buy an indoor pot for your black orchid that you can place near an artificial light source.
- Provide your black orchid with plenty of water and fertilizer: Black orchids need regular watering and fertilization to grow properly. Pour enough water into the pot to cover the roots and add a balanced mix of fertilizer to the soil. If you do not want to get your hands dirty, spray the plant with water from a hose every other day or use a water-soluble fertilizer.
- Be patient: Growing black orchids from seed take time, so be patient and allow the plant to grow in its new location for at least six months before starting to prune it or adjust its watering schedule.
- Prune your black orchid regularly: Once it has grown large enough, it is important to start pruning it back regularly. This will help keep the plant healthy and ensure that it produces flowers.
5 best ways to keep your orchid warm in winter
If you have an orchid that you care for in your home, keeping it warm in the winter can be a challenge. There are a few ways to try and keep your orchid warm, and here are five of the best:
- Place It In A Warm Place: One of the simplest ways to keep an orchid warm is to place it in a warm place. This could be on top of a radiator, near a fire, or even inside an oven. If you have more than one orchid, give them different places to stay so they don’t get too hot.
- Use A Heater: Another option is to use a heater. Every type and size of heater is available, so there’s bound to be one that will work well for your orchid. Just ensure that the temperature setting is appropriate for the type of orchid you have, and keep it running until it cools again.
- Use A Cooling Tray: If you don’t have access to a heater, another option is to use a cooling tray. These trays contain several small cups filled with ice and water and can be placed near or inside the orchid. The ice will help cool the orchid, and the water will help keep it moist.
- Use A Humidifier: If your orchid doesn’t do well in cold environments, you can try using a humidifier. Moisture added by these devices has the potential to help to keep your orchid warm. Ensure that the humidity level is appropriate for your orchid and keep it on until it becomes cool again.
- Place It In A Freezing Container: If all else fails, you can place your orchid in a freezing container. This will shock it and cause it to thaw out, hopefully giving you enough time to find a warmer place for it to stay.
How Often Should I Water My Orchid In The Winter?
Orchids are one of the most popular houseplants, but they can be finicky. One of the most common questions about orchids is how often to water them, especially in the winter.
When it comes to watering schedules, there are a few variables to consider, such as the type of orchid, the potting mix, the size of the pot, and the humidity and temperature of your home. Generally, it would help if you water your orchid once a week, allowing the potting mix to dry out completely between waterings.
If you live in a warm, humid climate, you may need to water your orchid more often. If your orchid is in a small pot, it will dry out more quickly than in a larger pot. And if you have an orchid that is a heavy bloomer, it will also need more water.
9 Tips For Caring For A Waterfall Orchid
Waterfall orchids are one of the more delicate types of orchids. They require high humidity, regular water changes, and weekly repotting. Here are some tips for caring for waterfall orchids:
- Keep the humidity high: Waterfall orchids need a lot of humidity to thrive. Keep the area around the plant well-watered and allow waterfalls to drip onto the roots occasionally.
- Change the water regularly: Waterfall orchids need to be kept moist to thrive and should be watered twice a day, morning and evening. Waterfall orchids need regular watering changes, so check the water level and change it as needed. If you have a reservoir, fill it up at least once a week and allow the waterfall to trickle over the roots.
- Light properly: Waterfall orchids need bright light to grow, so place them near a window that receives morning sun. Avoid direct sun exposure, which can damage the plant’s leaves.
- Fertilize them regularly: as with all orchids, they will benefit from regular fertilization. Use a high-quality fertilizer specifically designed for flower plants twice a month during the spring and summer.
- Repot regularly: Waterfall orchids should be repotted every two years to keep them healthy and flowering. Choose a fresh potting soil mixture and insert the plant into it carefully. Firmly pack down the soil around the roots before adding more soil until there is just a thin layer covering them. Water thoroughly before sticking your nose in there again!
- Protect them from frost: If your climate is cold enough that frost may occur during the winter, be sure to cover your waterfall orchid with some kind of material (a blanket, a sheet, a tarp) to keep it warm.
- Monitor growth: Waterfall orchids should be kept short so the flower can sit on top of the column. To check for growth, gently pull back the leaves and look for new blooms or bud formation.
- Improve drainage: Waterfall orchids need good drainage to keep their roots from rotting. If their pot has poor drainage, water will seep through the bottom of the pot and drown the plant. You can improve drainage by adding rocks, gravel, or a layer of sand to the bottom of the pot.
- Prune regularly: Prune off dead flowers and stems every few weeks in early summer and again in late winter/early spring, when new growth begins to appear. This will help promote new blooms in future seasons.
Following these tips will make your Waterfall orchid healthy and beautiful.
How to Take Care of a Mystique Orchid
Mystique orchids are some of the world’s most beautiful and sought-after plants. They are also some of the most challenging to take care of. Here are a few tips on how to take care of a mystique orchid:
Choose the Right Location
When deciding where to place your mystique orchid, it is important to consider the plant’s natural environment. This means choosing a location that will provide the orchid with ample sunlight and humidity. If you live in an area with mild weather, you can place your orchid in a sunny spot. Consider placing your orchid in a heated greenhouse if you live in a colder climate. Keep in mind that mystique orchids are tropical plants, so they require high humidity levels to thrive.
Choose the Right Soil
Soil is an important part of caring for mystique orchids. The type of soil best for your orchid will depend on the climate and location where it will be grown. The following are some tips to help you choose the right soil for your orchid:
If you live in a warm climate, try using soil rich in organic matter. This will help to keep the roots cool and moist.
If you live in a cold climate, try to use soil that is sandy or has some clay content. This will help prevent frostbite of the roots.
If you live in an area that gets a lot of rain, try using a soil mix with some limestone. This will help keep the roots moist and help to prevent root rot.
Choose the Right Orchid Pot
Orchid pots come in a variety of shapes and sizes. Make sure to choose one that is big enough for the roots and plant so that it doesn’t touch the sides of the pot. Don’t use a pot that is too small, or your orchid may struggle to get enough oxygen and water.
Water the Plant
Mystique orchids need high levels of humidity to survive. Make sure to water your plant regularly, especially during dry periods. Mist the orchid occasionally with a spray bottle filled with water.
Fertilize the Plant
Mystique orchids require fertilizer during the growing season. Follow the instructions provided with the fertilizer you use. Fertilize every two weeks in the spring and summer and every four weeks during fall and winter.
Prune the Plant
During the growing season, prune your mystique orchid back to one stem per leaf. In winter, prune back to one stem per two leaves.
Remove Old Leaves
Old leaves on the mystique orchid will yellow and drop off. Remove them to keep the plant healthy and beautiful.
Repot the Plant
If the pot your orchid is in begins to show signs of wear, it’s time to repot it. Use a soil mix that’s designed for orchids. Fill the pot halfway with the new soil, spread out the roots, and poke some holes in the bottom of the pot. Replace the old pot with the new one and secure it with soil screws or wires.
Provide Proper Sun and Shade
What are the main things you need to take care of when caring for mystique orchids? Proper sun and shade are essential, as these plants can be sensitive to too much light or heat. Make sure the plant always has plenty of water, and fertilize every two weeks in the spring and summer with a balanced, water-soluble fertilizer. You may consider moving it to a shadier spot if your orchid gets too much water.
Temperature and Humidity
Temperature and humidity are key factors that must be considered when caring for mystique orchids. Too low of a temperature can cause the plant to go dormant, while high humidity levels can cause problems such as mold and fungus growth. Operating your orchidarium at a comfortable temperature and maintaining an appropriate humidity level by spraying the plants occasionally with water or using a humidifier.
Clean Your Orchid Cases Regularly
One of the most important things you can do to keep your orchid healthy is clean their cases regularly. Dirty cases can lead to fungal growth and may even prevent your orchid from flowering. Use a mild soap and warm water to clean your orchid’s case. Be sure to rinse off all the soap residue, and then dry the case off thoroughly. Suppose you notice any browning, fungus, or other problems with your orchid’s growth. In that case, it is important to take action right away. Contact a qualified grower to help maintain your orchid’s health and beauty.
Following these tips will make your mystique orchid healthy and beautiful.
How to properly care for an orchid to prevent root rot?
When it comes to orchids, proper care is essential to preventing root rot. Here are some tips for keeping your orchid healthy and thriving:
Water your orchid properly: Make sure to water your orchid regularly, especially in the summer when the plant is thirsty. Over-watering can cause root rot.
Give it plenty of light: Orchids need a lot of light, so make sure they have plenty of windowsills or artificial light to keep them happy. If you don’t have a lot of natural light, try planting them near a bright window.
Feed it fertilizer: Orchids typically need fertilizer every two weeks in the spring and fall but check with your local nursery for instructions on how much and what type of fertilizer to use for your specific plant.
Prune it regularly: Proper pruning helps reduce the risk of root rot by removing dead flowers and leaves that may harbor pests and fungus spores that can cause damage to the root system.
Keep an eye out for signs of trouble: Don’t wait to act if you notice any yellowing or browning on any part of the orchid’s root system. Remove the plant from its pot and give it a good cleaning before treating the root rot with a fungicide or other solution.
Some Common Problems
What are some common problems with orchids in winter?
Many orchids enjoy warm temperatures during the summer months but may struggle in the colder winter months. Some common problems orchids experience in winter include:
- Drooping foliage: Orchids with drooping foliage may not get the sunlight they need to stay healthy and may suffer as a result.
- Poor air circulation: Poor air circulation can cause leaves to be brown and die, making it difficult for orchids to get enough oxygen and nutrients.
- Low humidity: Leaves can droop due to low humidity and turn yellow, making it difficult for orchids to extract water from their soil.
- Reduced water availability: If there is little rainfall in the area, or if water is restricted due to a cold-weather snap, then orchid roots may not be able to access enough moisture to stay healthy.
- Low temperatures: Orchids do best between 64 and 78 degrees Fahrenheit, so if temperatures drop below this range, they may struggle to survive.
Why do orchid leaves turn yellow?
Several factors can cause orchid leaves to turn yellow, including direct sunlight exposure, high fertilizers or pesticides in the soil, and fungal infection. To help prevent orchid leaves from turning yellow, you can try to provide supplemental light, use low levels of fertilizers or pesticides, and remove any debris from around the plant. If a fungal infection causes the yellowing, you can treat the plant with an antifungal agent.
Exposure To Low Or High Temperatures
Exposure to low or high temperatures can cause orchid leaves to turn yellow. Low temperatures will cause the plant’s enzymes to slow down, making the leaves yellow and wilted. High temperatures will cause the plant’s cells to burst, making the leaves yellow and wilted.
Exposure To Direct Sunlight
Exposure to direct sunlight can cause orchid leaves to turn yellow. Direct sunlight is a strong light source that can damage the plant’s cells and cause the leaves to turn yellow.
High Levels Of Fertilizers Or Pesticides In The Soil
High fertilizers or pesticides in the soil can cause orchid leaves to turn yellow. Fertilizers and pesticides can interact with each other and the plant’s cells, making the leaves yellow and wilted.
Low Levels Of Oxygen In The Soil
Low oxygen levels in the soil can cause the yellowing of orchid leaves. The stems and roots of the orchid cannot access enough oxygen to produce chlorophyll. This green pigment helps the plant absorb sunlight. Although orchids can survive with low oxygen levels, they typically do better when there is more available.
Overwatering Can Lead to Yellowing Leaves
Overwatering can lead to yellowing leaves because it causes the plant to lose water through transpiration and respiration. The leaves will turn yellow due to the lack of chlorophyll, which helps produce energy from sunlight. To prevent this problem, water your orchid frequently but not too much. Also, keep the orchid’s environment clean by removing any excess water droplets that may accumulate on the leaves.
Underwatering Can Lead to Yellowing Leaves
Underwatering can lead to yellowing leaves because it decreases oxygen availability to the plant. When the plant cannot get enough oxygen, it breaks down its leaves. Underwatering can also lead to other problems like fungal overgrowth and root rot. If you are unsure if your orchid is getting enough water, you can check the soil’s moisture level with a moisture meter.
Too Much or Too Little Light
Too much light will cause the orchid leaves to turn yellow and eventually die. Too little light will not allow the orchid to photosynthesize properly, causing the leaves to become pale and die. Proper light levels for orchids depend on the size of the plant and the type of lighting used.
The Natural Death Of Old Foliage On The Plant
The natural death of old foliage on plants can lead to yellowing leaves. The leaf cells in the older leaves will start to die and convert to a brown or black pigment. This accumulation of pigment in the leaf cell can eventually cause the yellowing of the leaf.
A Sudden Change In The Environment
When an orchid’s environment suddenly changes, such as when a plant is moved from direct sunlight to a dark corner, the leaves may turn yellow. This yellowing is due to the plant’s inability to make chlorophyll. This main pigment allows plants to capture sunlight and convert it into energy. The lack of chlorophyll decreases the energy production in the leaves, and they eventually turn yellow. There are several causes of sudden environmental changes that can affect orchids. Still, this often occurs when orchids are moved from their natural habitat.
Fungal or Bacterial Infections
Fungal infections can cause leaves to turn yellow and fall off the plant. The fungus is often spread through water or soil contaminated with its spores. Fungal infections can be treated with various fungicides but often require repeated treatments. Bacterial infections can also cause leaves to turn yellow and fall off the plant. The bacteria are often spread through water or soil contaminated with its spores. Bacterial infections can be treated with antibiotics but often require repeated treatments.
Nutrient Deficiencies
Orchid leaves may turn yellow and fall off the plant if the plant is deficient in certain nutrients. Iron is the most common nutrient deficiency that causes orchid leaves to turn yellow and fall off the plant. Iron deficiency can be caused by factors such as low levels of intake from food or water, inadequate absorption from the intestines, or damage to the liver caused by alcohol abuse.
Orchid leaves may turn yellow and fall off the plant if the plant is deficient in certain nutrients. Iron is the most common nutrient deficiency that causes orchid leaves to turn yellow and fall off the plant. Iron deficiency can be caused by several factors, such as low intake levels from food or water, inadequate absorption from the intestines, or damage to the liver caused by alcohol abuse.
Humidity Levels
The cause of yellowing leaves in orchids is usually a combination of too little water and high humidity levels. When the humidity levels are too high, the water droplets on the leaves will condense and turn yellow.
On the other hand, if there is not enough water available, the leaves will not be able to take up water from the air and turn yellow. There are a few ways to solve this problem. One way is to ensure enough water is available in the plant’s pot. Another solution is to move the orchid into a drier area.
Root Rot
Root rot is a fungal disease that affects plant roots. It can lead to yellowing leaves as the fungus grows and spreads through the plant’s system. There are several root rot causes, but overwatering is one of the most common.
When roots get too wet, they can’t function properly and become infected with fungi. Another cause of root rot is a lack of light and moisture. When the soil doesn’t have enough nutrients or moisture, fungal spores can grow and cause root rot in plants.
Exposure To Hard Water Or Chemicals
Exposure to hard water or chemicals can cause orchid leaves to turn yellow. The leaves are subject to a decrease in water uptake, which results in the leaves becoming dry and brittle. The leaves also become discolored due to the accumulation of minerals and other chemicals on the leaf’s surface.
Potting Stress
Potting stress is the most common cause of yellowing leaves in orchids. When orchid plants are moved from their growing medium to new pots, they may experience a decline in growth and leaf color. The roots become entangled in the new potting soil, and the plant cannot exchange water and nutrients as efficiently. Over time, this can lead to weakened plants and yellowing leaves.
Pest Problems
A variety of pests can cause yellowing leaves on orchids. The most common is the mealybug, which feeds on the plant’s sap. Mealybugs excrete a substance that causes the leaves to become yellow and drippy. Other pests that cause yellowing leaves on orchids include aphids, scale insects, and spider mites.
Homeowners can use many techniques to control these pests, including insecticidal soap and natural repellents. In some cases, however, removing the plant from the area may be necessary, or treating it with a pesticide.
What Are the common problems with your waterfall Orchid?
When it comes to caring for waterfall orchids, there are a few things you need to keep an eye out for. Here are some problems that something may be wrong with your orchid:
- Drooping petals: If your petals start to droop noticeably, this could be a sign of a pest or disease affecting your orchid. Check the plant thoroughly for any pests or diseases, and take appropriate action if necessary.
- Brownish patches on the leaves: If you notice brown patches on the leaves, this could also be a sign of a pest or disease affecting your plants. Once again, check the plant thoroughly for any pests or diseases, and take appropriate action if necessary.
- Bleeding from the stem: If you notice bleeding from the stem of your waterfall orchid, this could also indicate a problem with the plant. Make sure to water regularly and watch for symptoms such as wilting and yellowing foliage to take appropriate action if necessary.
- Poor growth: If your waterfall Orchid is not growing at its usual rate, this could indicate a problem with the plant. Make sure to water regularly and check the plant for any signs of infection or damage.
- Dead leaves: If you notice that your waterfall Orchid is losing a lot of leaves, this could be a sign of a problem with the plant. Make sure to water regularly and check for any other symptoms such as wilting or yellowing foliage to take appropriate action if necessary.
How do I know if my orchid has aphids
There are a few ways to tell if your orchid has aphids.
- One way is to look for small, soft-bodied insects on the leaves or stems of the plant. These insects may be white, green, black, or brown and often congregate in groups.
- Another way to tell if your orchid has aphids is to look for damage to the leaves or stems. Aphids can cause leaves to curl up or discolor, and they may also cause stems to become distorted.
If you see any of these signs, it’s a good idea to check for aphids.
Why does mold grow on orchid roots?
Mold is a fungus that thrives in warm, moist environments. This often means that you can find it growing on the roots of orchids. While there are many different types of mold, all of them thrive in humid conditions.
One reason mold may grow on orchid roots is that the plants are watered frequently. When the roots are constantly wet, this creates an ideal environment for mold to grow. Additionally, orchids typically have very loose soil, allowing mold to thrive.
Another reason mold may grow on orchid roots is the humidity levels in the air. There is a problem with your home’s humidity levels if you live in an area with a high percentage, which can cause mold to grow on your orchid’s roots.
What Are the Signs of a Pest or Disease Affecting your Mystique Orchid?
Suppose you are noticing any of the following signs. In that case, your mystique orchid is likely experiencing some pest or disease issue:
1) leaves turning yellow, brown, or falling off prematurely;
2) flowers becoming wilted and not appearing to be in full bloom;
3) orchid petals falling off completely;
4) an unpleasant odor coming from the plant.
If you notice any of these signs, it is important to take appropriate action immediately to prevent further damage and potential loss of your orchid. First and foremost, ensure that the plant gets plenty of water; if it’s consistently dry, add a little water regularly to the pot.
If the leaves are yellowing or turning brown, this may indicate a problem with pests such as aphids. If there are aphids and they’re sucking the nutrients out of the leaves, then they will cause them to turn color and fall off.
If there is an unpleasant odor coming from your mystique orchid, this could be a sign that mold has started growing; if this happens, you should take appropriate steps to get rid of the mold, and hopefully, the odor will go away.
Finally, if you notice that any of the flowers are wilting or not appearing to be in full bloom, this could also be a sign of a problem.
If the flowers are wilting, it may be because they’re not getting enough water; if they do not appear to be in bloom, it may be because pests or diseases are taking over the flowers.
In either case, it’s important to take appropriate action and get help from a professional so that your mystique orchid can continue to be healthy and beautiful!
Why is my orchid flower spike turning yellow?
Most orchids bloom sporadically and will produce flowers at different times throughout the year. Several factors can cause this, but one common cause is enzyme deficiency. When the orchid’s roots are deprived of this enzyme, they cannot properly break down nutrients and minerals, leading to a shortage of color in the flower spike.
Another possible reason for yellowing in an orchid flower spike could be damage to the stem or leaves. Suppose water is not flowing evenly through the plant’s system. In that case, it can cause brown patches on the leaves that eventually turn yellow and die.
8 Causes For Spike In Yellow Orchid Flowers
Here are eight possible causes of a yellow orchid flower spike:
- Enzyme deficiency: One potential cause of a yellow orchid flower spike could be a deficiency in an enzyme. This can result from a lack of sunlight, water, or other environmental factors. A shortage of this enzyme can cause the plant to produce less color in the flowers.
- Nutrient imbalance: Another potential cause of a yellow orchid flower spike could be a nutrient imbalance. This could be due to a plant’s environment or diet change. An imbalance in nutrients can lead to a decrease in color in the flowers and other problems like abnormal growth and Blossom End Rot.
- Damage to stem or leaves: Damage to the stem or leaves of the plant may also lead to a spike in flower growth. Suppose water is not flowing evenly through the system. In that case, it can cause brown patches on the leaves that eventually turn yellow and die. This damage is typically irreversible and will lead to a loss of color and life expectancy for the plant.
- Zinc Deficiency: A lack of zinc can cause several issues with orchids, including yellow flower spikes. A lack of zinc can decrease the breakdown of nutrients and minerals, leading to a shortage of color in the flower spike.
- Nitrogen Deprivation: A lack of nitrogen can lead to orchid growth problems, including yellow flower spikes. A lack of nitrogen can decrease the breakdown of nutrients and minerals, leading to a shortage of color in the flower spike. Additionally, a lack of nitrogen can also cause damage to the stem and leaves of the orchid. Suppose water is not flowing evenly through the plant’s system. In that case, it can cause brown patches on the leaves that eventually turn yellow and die.
- Phosphorous Deficiency: Aphid infestation is another potential reason for a yellow orchid flower spike. Aphids are small insects that feed on plant tissues. Suppose an abundance of aphids is present on an orchid. In that case, they may consume enough phosphorus to cause deficiency symptoms in the plant. A lack of phosphorus can lead to problems with flower development and leaf growth abnormalities.
- Waterlogging: Waterlogging is another potential culprit for why an orchid might experience a late winter or early spring flower spike due to increased growth rates. When excessive amounts of water accumulate on top of an orchid’s root system, it can create conditions where fungi grow faster than normal. This fungus produces compounds that inhibit root growth along with other flowering plants nearby (this process is called allelopathy). This increases growth rates at first but later reduces yields as these flowers become heavy with water weight and cannot produce new flowers easily due to restricted root function. Heavy rainfall during this period could also be responsible for waterlogging on plants in areas prone to flooding.
- Temperature Fluctuations: Another issue that can cause an orchid to experience a late winter or early spring flower spike is temperature fluctuations. When the weather outside is unpredictable, it can lead to stress on the plant. This stress can cause flowers to open prematurely due to increased activity within the flower stems and florets and increased production of ethylene gas, which can cause leaves and flowers to droop and wilt.
While sudden temperature changes are the most harmful, gradual changes can also cause plant stress and lead to flowers opening late or not at all.
10 Most Common causes why orchids won’t grow stems
There are many reasons why orchids may not grow a stem. Ten common causes include:
- Improper watering: One of the most common reasons that orchids won’t grow stems is that they do not receive the correct amount of water. Check the soil daily and water when it feels dry, not wet.
- Incorrect fertilizer: Another common mistake orchid growers make is using the wrong amount of fertilizer. Follow the directions on the package carefully to avoid overdoing it.
- Too deep in the ground: If your orchid’s roots are too deep, they may be unable to reach up towards the surface and grow a stem. You can try lifting a section of turf and checking to see if any roots extend more than a couple of inches below the soil surface.
- Stunted root growth: One other reason why orchids may not grow stems is that their roots are stunted in growth. This can be caused by several factors, including low light levels, cold temperatures, or insufficient watering. To fix this issue, you will need to increase light levels for your orchid, give it warm temperatures during colder months, and increase its water supply.
- Inadequate light: This is probably the most common reason orchids will not grow stems. Too little light can stunt the growth of orchid leaves, leading to a lack of energy and potential stem formation.
- Dryness: Lack of water can also lead to stunted growth in orchid plants. Overwatering is one cause of this problem, but it can also be caused by inadequate drainage in the growing area.
- Misdirected nutrients: Many plants need specific types and amounts of nutrients to grow correctly, but neglecting to provide these nutrients can also lead to stunted growth in orchids. Make sure you’re providing your plant with the right amount of fertilizer and water – if you’re unsure what kind to get, consult a gardening expert!
- Improper pH levels: Incorrect pH levels are another common issue preventing orchids from growing stems. Over the years, many people mistakenly added acid to their orchid soil to boost growth, but this usually backfires. A more appropriate pH level for orchids is around 6.5 to 7.0.
- Incompatible plants: If you’re trying to grow orchids next to other plants in your garden, make sure they are compatible before planting. Otherwise, you may experience conflicts with your orchid’s growth. For example, some plants are known to inhibit stem growth in orchids, including morning glory vines and spiderworts.
- Poor drainage: One of the main reasons orchids don’t tend to grow stems is their soil is poorly drained. Suppose your orchid’s growing area is constantly wet. In that case, it’ll be difficult for the plant to extract the necessary nutrients and water. Fixing drainage issues can help your orchid grow healthy stems in no time!
If any of these reasons seem like they could be causing your orchid problems with stem growth, don’t hesitate to consult a gardening expert for help!
Why is my orchid stem turning yellow?
There are many reasons why your orchid’s stem might turn yellow. One possibility is that the plant is not getting enough light. Another reason might be that the potting mix is too wet or too dry. A lack of nutrients can also cause stems to turn yellow. If you suspect any of these issues, take a closer look at your orchid’s care routine and adjust as needed.
12 Potential causes for orchid Stems to Turn Yellow
There are many reasons why orchid stems might turn yellow, including improper watering, overfertilizing, and pests. Here are twelve potential causes:
- Improper watering: Moistening the soil daily and ensuring that the soil remains evenly moist is important for orchids. But if you neglect to water them often enough, the roots will dry out, and the stem will turn yellow.
- Overfertilizing: Orchids love a healthy balance of nutrients, but if you give them too much fertilizer, they’ll grow too vigorously, and the stem will turn yellow. Signs that your orchid needs more fertilizer include wilting leaves and flowers drooping or browning.
- Pests: Orchid pests can cause various problems, from stunted growth to wilted flowers. If you notice these symptoms on your orchid, take action quickly by treating the plant with an insecticide or fungicide.
- Genetics: Some orchids are more prone to turning yellow than others. If you have an orchid in your family for generations, there’s a good chance it will turn yellow eventually.
- Environmental stress: Orchids can suffer from environmental stress, such as high levels of humidity, low light levels, or cold temperatures. If these conditions persist for too long, they can cause the stem to turn yellow.
- Older plants: As orchids age, their cells start to break down, and their stems may turn yellow. This process is known as senescence, and it’s normal for most orchids after around ten years of growth.
- Root rot: This is a common cause of plant decline, and can occur when the roots rot due to improper drainage, exposure to too much moisture, or a lack of oxygen.
- Not getting enough light: Most orchids need at least six hours of direct sunlight per day to grow successfully. If your orchid isn’t getting enough light, it may start to turn yellow.
- Having too many orchids: A overabundance of orchids can also cause the stems to turn yellow. This is because they compete for light and nutrients, weakening plants.
- Fertilizing: Too much fertilizer can also lead to yellowing in the stems of your orchid. Over-fertilizing can cause excess water uptake, which can rot the stem tissue. Instead, use a balanced fertilizer that contains all the necessary elements for healthy growth.
- A lack of nutrients: One of the most common reasons for yellowing in an orchid’s stem is a lack of nutrients. If your plant isn’t getting the nutrients it needs, the leaves may turn yellow, and the stem may start to turn yellow.
- Yellowing caused by fungus: Fungi can cause leaves on plants to turn yellow and drop off, damaging the stem tissue. If you notice your orchid’s stem becoming pale and dry looking, it might be worth checking for fungal damage.
Revive Guide
How To Revive Orchid Leaves?
Orchid leaves may appear limp, yellow, or brown and may have a dull appearance. There are a few things that you can do to help revive the leaves on your orchid.
- Remove any dead or diseased leaves. This will help to improve the overall health of the plant.
- Give your orchid a good watering schedule. A well-hydrated orchid will have healthy leaves that look vibrant and green.
- Fertilize your orchid with a high-nitrogen fertilizer in Spring and Fall to help promote strong growth and flowering later in the year.
- Prune your orchid regularly to promote strong, healthy growth.
- Avoid over-watering your orchid. This will cause the leaves to droop and become limp.
- Avoid leaving your orchid in direct sunlight. This will cause the leaves to become dry and brittle.
- Avoid over-fertilizing your orchid with nitrogen, as this can cause overgrowth and toxicity problems.
- Keep your orchid away from drafts and windows in a warm, dry location.
- Use a fungicide to control fungal diseases if they occur.
How to Revive an Orchid with wrinkled leaves?
Orchids are one of the most popular flowers in the world, and for a good reason- their delicate leaves and flower heads are a sight to behold. However, orchid leaves can start to turn yellow and droop if they’re not cared for properly. Here’s how to revive orchid leaves so they look vibrant and new again:
The first step is to make sure your orchid is getting enough water. Give it a good soaking every week, even if it doesn’t look like it needs it. Orchids need moderate moisture to stay healthy, so don’t overwater them.
Another important step is fertilizer. Use a diluted fertilizer solution once a month to help perk up your orchid’s growth. Ensure your fertilizer is organic, as synthetic fertilizers can harm your orchid.
Finally, give your orchid some sunlight and warmth if it’s cold outside. Exposure to natural light will help the plant produce new leaves. In contrast, a warm environment will help it keep its leaves healthy and hydrated.
How To Fix Sunburned Orchid Leaves?
When orchids are exposed to direct sunlight, their leaves can become sunburned and lack color. There are a few ways to revive sunburnt orchid leaves:
- Wash the leaves in cool water and soap.
- Apply a light layer of petroleum jelly or Vaseline to the affected area.
- Place the orchid in indirect sunlight for several hours daily until the leaves regain color.
How do you revive wilted orchid leaves?
If you have an orchid starting to show signs of wilting leaves, you can do a few things to help revive the plant. First, make sure the orchid has enough water. Orchids typically need about 1 inch of water per week, so check the potting mix and give the plant plenty of water if it seems dry. If the orchid still isn’t recovering, try using a fungicide. A fungicide will kill any fungus causing the wilting leaves and should help your orchid recover quickly.
How to Revive an Orchid with Limp Leaves?
If your orchid leaves are limp and falling off, there is a chance that you can revive them by following these simple steps:
- Check the soil around the orchid for any pests or diseases. If there is an issue, take appropriate action before proceeding with the treatment.
- Clean the orchid pot and surrounding soil of any debris.
- Remove any dead leaves from the plant.
- Fill a small container with room-temperature water and add 1 cup of white vinegar (5% acidity). Swish the water and vinegar inside the pot until all the soil is wetted, then pour it out.
- Mist your orchid leaves with a spray bottle filled with water until they become moist again.
- Feed your orchid with a balanced orchid fertilizer once a month.
How to fix leathery orchid leaves?
Orchids are one of the most popular flower types globally and for a good reason. They are beautiful, easy to care for, and provide years of enjoyment. However, like all plants, orchids can experience declines in health over time. This can lead to leathery leaves and a loss of flowers.
You can do a few things to help revive orchid leaves and restore their health:
- Make sure your orchid is receiving enough light and water.
- Try using a soil mix that is specifically designed for orchids.
- Regularly mist the leaves with water to keep them hydrated and healthy.
How to Revive an Orchid with Curly Leaves?
It might be challenging to believe, but orchid leaves can die. This is especially true for those orchids that have curly leaves. Curly leaves are typically more susceptible to dying because of a lack of water and nutrients.
If your orchid has curled leaves, there are a few things you can do to help revive them:
- Make sure that the orchid has plenty of water and nutrients.
- Try to keep the orchid in a warm environment.
- After following these tips, you may need to take the orchid to a specialist if the problem persists.
How to Revive Orchid Leaves with Brown Tips?
If your orchid has brown tips on its leaves, it is time to revive them. Brown tips result from over-watering or not providing enough light to the plant:
- Make sure that the plant is watered correctly.
- Provide enough light to the plant by setting it in a sunny spot.
- Wait until new growth appears and cut off the brown tips.
How to Revive Orchid Leaves that Drop Off?
If you have an orchid starting to lose leaves, you may wonder how to revive them. There are a few things that you can do to help your orchid recover, but it will require some patience and effort on your part.
First, make sure that the orchid is getting enough water. If the orchid is in a pot, try watering it once a day instead of every other day. If the orchid is in a vase, water it every day. Make sure that the soil is moist but not soggy.
Next, try fertilizing your orchid with something like fertilizer tea made from worm castings and kelp powder. This will help promote growth and strength in the plant’s leaves and flowers.
Finally, provide the orchid with enough light. If you have an orchid in a pot, try setting it in a sunny spot. If the orchid is in a vase, try placing it near a window.
How to Revive Orchid with Mottled Appearance of the Leaves?
Orchid leaves may look mottled and faded when they are not getting the amount of water and sunlight they need. If you notice this problem with your orchid, you can do a few things to save it.
The first step is to make sure the orchid has fresh water available. Orchids need about 1 inch of water per week to stay healthy. Make sure the pot has good drainage and fill it partway with fresh water every time you water the plant.
It is important to provide proper sunlight once you have ensured that the orchid has plenty of water. Orchids like light, but too much can damage their leaves. Try to position your orchid to receive at least six hours of direct sunlight daily.
If you still notice that the leaves on your orchid are faded or mottled, there are a few things you can do to help. First, try to change the environment your orchid is in. Move it to a brighter spot in your home, or buy an Orchid light for better lighting. If these measures do not work, you may need to take your orchid to a professional nursery.
How to revive an orchid without leaves?
If your orchid has lost its leaves, you can do a few things to try and revive them. One option is to water the plant regularly and fertilize it with a weak fertilizer solution. Another option is to cut off the damaged leaves and replace them with fresh ones from an existing orchid. Finally, you can also try grafting the plant onto another stem to create a new plant with some of the original orchid’s characteristics.
How to save an orchid with root rot?
If your orchid has root rot, you may be able to save it by treating the root system with a fungicide or by transplanting it to fresh soil. There are also a few other things that you can do to help. For example, you can water the orchid regularly and ensure the soil is well-drained. You can also try to prevent root rot by keeping the orchid in a warm, humid environment.
5 Ways To Save An Orchid With Root Rot
The orchid family is one of the most popular flower gardens in the world. They are easy to grow and have a long blooming season. However, they are also sensitive to pests and diseases. One of the most common problems with orchids is root rot. This occurs when a fungus attacks the plant’s roots and causes them to rot. There are several ways to save an orchid from root rot, but choosing the right method for your orchid species and cultivar is important.
- Remove any infected plants immediately. If you don’t have access to a greenhouse, use fans or cold frames to cool off the plants until you can get them fixed. Orchids in warm environments will likely die from root rot regardless of treatment.
- Use fungicides that contain azole chemicals such as oxadiazoles, triazoles, and thiophenes. These chemicals kill fungus while leaving the plant healthy enough to grow new roots. Consult your local garden center for recommendations specific to your orchid species and cultivar. Make sure you read the label before applying these products!
- Use compost Tea. This method was developed for root rot in roses but has been successfully used to treat orchids. Make a compost tea by mixing 1 cup of organic compost with 1 quart of water. Steep the mixture for 2 hours before using it to water your orchid plants. Be sure to dilute the tea before applying it to tender roots.
- Use a rooting hormone. This is an effective and safe way to help new roots form quickly. Orchid root hormones are available from garden centers and online retailers. They should be applied at a rate of ¼ ounce per gallon of water.
- Place an orchid in a warm environment until new healthy roots grow. Temperatures above 95 degrees will encourage root growth, while temperatures below 50 degrees will stunt it. If you can’t bring the plant inside, place it in a sunny window with indirect sunlight.
If all else fails and your orchid is dead, consider using a plant resurrection method such as cryopreservation or burial in sand and gravel until future propagation is possible (note: this may not be possible with certain types of orchids).
10 Best Ways To Remove Mold From Orchid Roots Safely And Effectively
Mold can be a serious problem for orchid plants, as it can cause root damage and even plant death. Fortunately, there are ten best safe and effective ways to remove mold from orchid roots.
- Use a bleach solution: Fill a spray bottle with the mixture after combining one cup of bleach with a half-gallon of water. Spray the moldy area with the remedy, then wait ten minutes before using a brush to scrub the area clean. For two days, repeat this procedure three times each day. Then, discontinue using the bleach solution.
- Use a fungicide: Pour two gallons of water and one tablespoon of a fungicide, such as paraquat, into a spray container. Spray the moldy area with the remedy, then wait ten minutes before using a brush to scrub the area clean. After repeating this procedure twice or three times a day, discontinue using the fungicide.
- Use boiling water: Bring a pot halfway full of water to a boil over the stovetop. Add 1 cup of white vinegar to the boiling water, and let it cool slightly before pouring it over the moldy area. Scrub the area with a brush, and wait 10 minutes before rinsing it off. Repeat this process twice daily for two days, then stop using the boiling water.
- Use ice: Fill a pot half full of water and freeze it overnight. Frozen water should be mixed with 1 cup of white vinegar, and let it cool slightly before pouring it over the moldy area. Scrub the area with a brush, and wait 10 minutes before rinsing it off. Repeat this process twice daily for two days, then stop using the ice.
- Use a vacuum cleaner: If the orchid’s surface is affected by the mold, use a vacuum cleaner to remove it. If the mold is located in the orchid’s roots, use a chopstick to pierce one end of the root near where it emerges from the ground and suck out the mold.
- Use orchid fertilizer: If the mold is located on the surface of the orchid, use orchid fertilizer to help replace nutrients lost to the mold. If the mold is located in the orchid’s roots, use a chopstick to pierce one end of the root near where it emerges from the ground and suck out the fungus.
- Use Baking Soda: Another option is to use baking soda. Baking soda is an all-purpose cleaner made from natural ingredients and will also help kill mold spores. To make a baking soda solution, combine one part baking soda with three parts water. Spray it on the moldy roots until it completely kills the mold.
- Use Vinegar: A different choice is to use vinegar. Additionally, vinegar can be used to clean surfaces and will aid in the elimination of any mold spores. You can make a vinegar solution by combining one part vinegar with three parts distilled or purified water. Until the mold is eliminated, spray it on the moldy roots.
- Remove the orchid: If the mold is located on the surface of the orchid, remove the orchid. If the mold is located in the orchid’s roots, use a chopstick to pierce one end of the root near where it emerges from the ground and suck out the fungus.
- Use hydrogen peroxide: If all other methods fail, you may need to use hydrogen peroxide. Hydrogen peroxide is a powerful disinfectant, and it will also help to kill any remaining mold spores. To make a hydrogen peroxide solution, mix one part of hydrogen peroxide with three parts of water. Spray it onto the moldy roots until all of the molds are gone.
How to Prevent Orchid Leaves from Turning Yellow?
One of the most common issues with orchids is leaves that turn yellow. This can be caused by several things, from overwatering to insufficient nutrients. Here are a few tips for preventing orchid leaves from turning yellow:
Make sure the soil is well-drained
A lack of well-drained soil is one common cause of orchid leaves turning yellow. If the soil cannot hold water, it will run off the plants and cause the leaves to turn yellow. One way to help solve this problem is to add gravel or sand to the soil to help it retain water. Another solution is to plant orchids in containers to get plenty of sunlight and water.
Water the orchid only when the soil is dry
Orchid leaves turn yellow when the plant is waterlogged. The water blocks sunlight from reaching the plant’s roots, causing the leaves to become chlorotic and yellow. Orchid plants should only be watered when the soil is dry to prevent this.
Avoid overhead watering
Overhead watering is one of the main reasons orchid leaves turn yellow. When water is sprayed directly overhead, it travels down to the plant’s roots and then up towards the leaves. However, orchid roots grow very deep and spread out, so they can access a lot of water even when it’s overhead watering.
This causes the leaves to become wetter than they need to be and causes them to turn yellow because of how much light they absorb. Always water your orchids from below rather than from overhead to prevent this.
Fertilize monthly with a balanced fertilizer that contains nitrogen and phosphorus
Orchids are plants that need special care to grow and thrive. Fertilization is an important part of orchid care. It helps ensure that the plants receive the nutrients to grow and flower.
One common cause of orchid leaves turning yellow is a lack of nitrogen. Nitrogen is a key nutrient for orchids, as it helps to create growth and flowers. To ensure that your orchid receives the nitrogen it needs, fertilize it monthly with a balanced fertilizer containing nitrogen and phosphorus.
Prune off dead or damaged leaves
There are many reasons why leaves may turn yellow and fall off an orchid. Dead or damaged leaves can cause the plant to lose water and nutrients, leading to the leaves turning yellow and falling off. Prune off dead or damaged leaves to help support the plant and prevent further damage.
Protect the orchid from wind and cold weather
The orchid leaf can turn yellow from the wind and cold weather. The best way to protect the orchid from the wind and cold weather is to keep it in a cool, dark place. You can also protect the orchid by wrapping it in a moist cloth.
Do not over-fertilize or over-water the orchid
Over-fertilizing or over-watering an orchid can cause the leaves to turn yellow and die. Too much fertilizer can imbalance the plant’s environment, while too much water can cause the roots to rot. To prevent it happen, your orchid must follow a specific watering schedule and fertilization routine.
Remove mealybugs and other pests by hand
Mealybugs are a type of insect that feed on flowers. They form colonies of 1000s of individual insects, and their presence can cause the leaves to turn yellow and fall off the plant. You’ll need to hand-remove all the mites from each leaf and any eggs or larvae hiding inside the stem or nodes to get rid of them. Inspect your plants regularly for signs of mites, and use a pesticide if necessary to get rid of them.
Check the orchid for pests every week or so
Every orchid needs to be checked for pests weekly or so. Here are some of the most common pests and what you can do to prevent them from attacking your orchid:
-Spider mites: These small, eight-legged creatures feed on plant sap and can severely damage a growing orchid. To prevent spider mites from attacking your orchid, inspect it for webs often and remove any webs you find. You can also use a horticultural oil spray on the plant’s leaves to repel these pests.
-Scale insects: These insects build protective shells over their bodies that make them hard to see and kill with treatments like soap and water. Scale insects usually attack tender new growth, so regularly check your orchid for scale insect damage and treat it if necessary.
– thrips: These tiny, flightless creatures feed on flower parts and can seriously damage an orchid’s blooms. To prevent thrips from attacking your orchid, inspect it for feeding damage and remove any affected parts. You can also use a horticultural oil spray on the plant’s leaves to repel these pests.
How to Fix an orchid flower spike turning yellow?
Suppose you notice that one or more of your orchid’s flower spikes are turning yellow and wilting. In that case, restoring their health is probably a simple solution.
Here are some tips to Fix an orchid flower spike turning yellow:
Inspect the Plant: It is always best to bring your orchid in for an inspection by a qualified mycologist before making any changes to the environment or care regimen. By doing this, you can rule out any potential causes of the yellowing and wilting and start on the path to restoring their health.
Remove the Spike: If the yellowing and wilting are localized to a single flower spike, it may be best to remove that spike. Cut off the stem at the base of the spike and water the plant thoroughly. Apply a high-quality fertilizer at least once a month during the growing season to help promote vigorous growth.
Clean the Spike: If the yellowing and wilting are more widespread, it may be necessary to clean the spike of any debris. Use a soft cloth or cotton swab to remove dirt, dust, or leaves. Wipe down the entire spike with a dry cloth to help restore moisture and promote healthy growth.
Water the Plant: While removing debris from the spike is important, neglecting to water the plant can also cause yellowing and wilting. Keep an eye on the soil moisture level and make adjustments as needed. Try not to over-water or use too much water at once; slowly drip water onto the plant’s roots until you see damp soil.
Fertilize the Plant: Fertilizing the plant can also help promote vigorous growth and prevent yellowing and wilting. Use a high-quality fertilizer specifically designed for orchids during the growing season.
5 Troubleshooting Tips To Help Your Orchid Grow A Strong Stem
There are many different causes for why an orchid may not grow a stem; in most cases, simply solving the problem will result in a healthy plant. Here are five tips to help you troubleshoot and correct the problem:
Tips 01. One common reason an orchid may not produce a stem is if it is too dry. Water the orchid regularly, soaking it thoroughly for at least an hour each time, and watch for signs of wilting. Suppose the plant does not produce a stem after several weeks of watering and good care. In that case, it may be necessary to rehydrate the plant with water that has been diluted with a nutrient solution.
Tips 02. Another common cause of stemless orchids is weak roots. Make sure your orchid has plenty of fresh potting soil, and enlarge the root area by breaking up large clumps with your fingers before planting. Suppose your orchid does not have stems after several weeks of nurturing care. In that case, it may be necessary to transplant it into a new potting mix specifically designed for growing orchids.
Tips 03. Incorrect light can also cause plants to lack stems. Place your orchid in a location where light can reach all parts of the plant, and make sure the orchid is positioned so that the top of the stem is directly overhead.
Tips 04. If your orchid has brown leaves, it may be experiencing a deficiency in copper, a mineral that helps produce chlorophyll. If necessary, check the soil for copper depletion and add a copper supplement to the potting mix.
Tips 05. Poor air circulation can also stunt an orchid’s growth. Make sure there is no obstruction in the flow of air around the plant and place it where it can receive ample sunlight and fresh air.
How Do You Fix Yellow Orchid Stems?
The stem of an orchid may start turning yellow and wilting due to a variety of reasons. Environmental causes, such as exposure to excessive water or wind, maybe environmental. In contrast, others may be caused by the orchid’s biology, such as a lack of light or nutrients. Correcting these issues will often require treatment from a professional grower. Here are some best ways to fix a yellow orchid stem:
- Increase the amount of light and shade available to the plant by moving it to a brighter location or adding artificial light.
- Check for nutritional deficiencies by performing a soil test and addressing any necessary deficiencies before adding new soil.
- Remove wilting leaves using gentle warm water and a soft cloth.
- Prune off diseased stems with sharp scissors, ensuring not to remove too much healthy tissue.
- Treat fungal infections with an appropriate fungicide before they spread further.
- Apply an organic fertilizer according to package instructions; note that over-fertilizing can also cause yellowing stem.
- Remove excess water from the potting mix with a spray bottle before adding new soil.
- Infected stems should be cut off at the base and the area treated with an antifungal agent.
- Remove orchid flowers infected with a virus, as they will not produce new flowers.
- Repot orchids every two years, removing old roots and adding fresh soil.
How Do You Get Rid Of Aphids On Orchids?
Aphids are a type of insect that can be found on many types of plants, including orchids. They are small, soft-bodied insects that can be green, black, or red. Aphids feed on the sap of plants by sucking out the fluid, which can damage the plant and lead to health problems.
If you suspect you have aphids on your orchid, there are a few things you can do to get rid of them:
Applying insecticidal soap
There are a few things that you can do to get rid of aphids on orchids, including applying insecticidal soap. Insecticidal soap is a chemical that kills aphids, but it is also safe for plants. To apply insecticidal soap, mix it with water in a spray bottle and then spray it on the aphid-infested plants. The soap will kill the aphids and damage any beneficial insects on the plants.
Apply neem oil or horticultural oil
Aphids are a common pest on orchids and can be difficult to eliminate. One way to eliminate them is by applying neem oil or horticultural oil spray. These sprays work by suffocating the aphids and can be effective against other pests. Be sure to follow the directions on the bottle carefully, and always test a small area first to ensure the spray doesn’t damage your orchid.
Use a strong stream of water
They can be difficult to eliminate, but a few methods can help. One is to use a strong stream of water to knock them off the plant. You can do this with a hose or with a power washer. Another option is to use an insecticide. There are many different types available, so choose one safe for orchids. Finally, you can try using a natural predator such as ladybugs or lacewings. These predators will eat the aphids and help control the population.
Remove them by hand
They can be removed using a soft cloth or cotton swab dipped in rubbing alcohol. Be sure to get all of the aphids, as they can quickly spread to other plants.
Destroy aphid eggs
If you’re having a problem with aphids on your orchids, there’s a simple solution – spray them with rubbing alcohol! The alcohol will kill the eggs, thus eliminating the aphids. Be sure to do this every few days until the aphid problem is gone.
Use yellow sticky traps
Aphids are tiny, sap-sucking insects that can cause serious damage to plants. Suppose you have an orchid and notice that it is covered in aphids. In that case, getting rid of them without using harmful chemicals is possible. You can use yellow sticky traps to attract and capture the aphids. The traps will stick to the aphids, and you can simply dispose of them.
Prune away infested leaves and stems
Aphids can be identified by their small, pear-shaped body and the presence of black or white spots on their wings. Aphids feed on the sap of plants, causing leaves to wilt and stems to die.
The best way to get rid of aphids on orchids is to prune away infested leaves and stems. Be sure to discard any diseased plant material to prevent the aphids from spreading.
Rotate your crops to avoid planting aphids
Aphids can be found on many different types of plants. They can cause damage to the plant by sucking sap from the leaves, which can lead to stunted growth or wilting. One way to reduce the likelihood of aphids infesting your plants is to rotate your crops so that you don’t plant aphid-susceptible plants in the same area yearly.
Conclusion
In conclusion, this Orchid Q&A has everything you need to know, whether you are a beginner or an expert. With tips on how to take care of your Orchid and what to do if it’s not blooming, this article is a helpful guide for all Orchid-lovers. So go out, get yourself an Orchid, and enjoy the beauty of these flowers.

My name is Md Deloar Hossain and I’m the creator of Club Gardening, designed for all your gardening ideas, gardening product reviews, and a place to help you find the best gardening experience possible.
