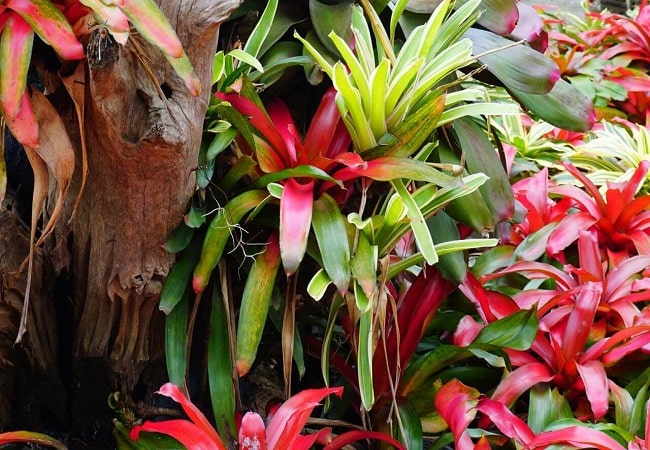
I just got a new bromeliad yesterday. It’s got a pink flower, and it’s got a puppy, too. Bromeliads’ propagation vibrant colors and interesting textures will add a touch of exoticism to any indoor or outdoor setting.
Bromeliads can be propagated in one of two ways: by seed or cuttings from the plant’s offsets.
In this article, I’ll explain the best practices for propagating bromeliads so that your plants thrive. To find out more, stay tuned.
Quick Navigation
The Right Way To Bromeliads Propagation For Maximize Plant Growth
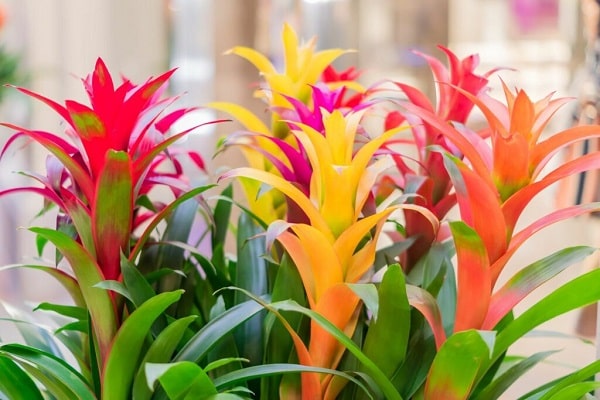
Bromeliads are tropical plants found in the rainforests of Central and South America. Bromeliads are known for their colorful flowers and ability to hold water in their leaves. You can propagate bromeliads from seed or by offsets.
Bromeliad Propagation Using Offsets
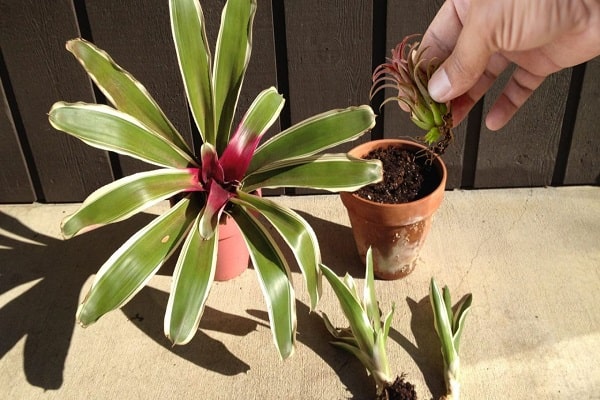
Bromeliad propagation is the process of growing new plants from existing ones. Offsets, or pups, are small plantlets that form at the base of the parent plant. These pups can be removed and planted to create new plants.
To propagate bromeliads using offsets, carefully remove the offset from the parent plant. The offset should have its roots and a small amount of foliage. Plant the offset in a pot filled with a well-draining potting mix. Water lightly and keep the soil moist but not soggy. Place the pot in a warm, bright location out of direct sunlight.
Once the offsets are established, they can be transplanted into larger pots or the garden. Bromeliads are relatively easy to propagate and make excellent houseplants or additions to the garden for year-round color and interest.
Bromeliad Propagation Using Seeds
Bromeliads indoors don’t generate seeds because birds, bats, or insects pollinate them. You can still pollinate flowers to harvest seeds.
Growing Bromeliads from seed is slower and more involved than using offsets. It’s cool to cultivate your houseplants, though. A project for houseplant lovers.
This is the procedure that you should follow:
- It would help if you used soap when washing your bromeliad seeds to remove the film of slime they are normally covered in. Put a few sheets of kitchen paper under them and let them air dry.
- Clean a few smaller plastic containers to the best of your ability. Make a few holes in the bottom of the container so that water can quickly drain out.
- Mix 60% potting soil and 40% perlite, and then add boiling water to the mixture. This will make it easy to sterilize the soil mixture for your bromeliad seedlings. You could also use a mix of sphagnum moss and vermiculite. There are many good options.
- Throw away the water and then pack the soil mixture into the plastic containers you had prepared.
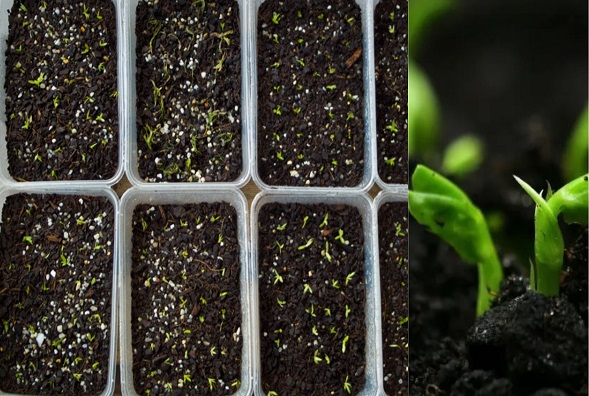
- On top of the soil and compost mixture, scatter the seeds. They shouldn’t be buried! They have a better chance of developing properly when just sprinkled on top.
- If you have any lids for the plastic containers, you should put them on now. If this is impossible, you can use plastic wrap to cover the containers and retain the moisture inside.
- Locate a pleasant area with plenty of light for your miniature bromeliad production stations. Stay out of direct sunlight and consider using grow lights instead.
- Important! Use an electric heating mat. Bromeliad seeds need a warm place to grow, and the best temperature for this is 25 degrees Celsius or 77 degrees Fahrenheit.
- When it looks like the soil mixture has dried out, moisten the bottom of the container. This effect requires more than submerging the plastic containers in a water bath. If you don’t scatter the seeds everywhere, the soil mixture can take in water through the holes in the bottom of the container.
- The seeds have a high probability of germinating rapidly, typically in days.
- Hold off on removing the lids from the plastic pots until each seedling has developed a few leaves on its own. After this, begin exposing the seedlings to their environment by removing the lids for longer and longer periods so that they may adapt.
- After a few weeks to a few months, your bromeliad seedlings should be strong enough to move into their separate planters. The time has come to give them away.
Care After Propagation Bromeliad Plant
Now You’ve made more Bromeliads, so you should be able to enjoy them for many years to come. Keep an eye on the mother plant, though, because she may keep making new plants until she dies.
So, how do you take care of your new bromeliad army? Care needs will depend on the species, of course. A simple Google search is always a smart idea. So, here are a few basics to get you going in the right direction:
Light
Most bromeliads do best in a nice, bright spot inside, but they don’t like direct sunlight. One exception is the genus Ananas, which includes pineapple plants and loves as much sun as you can give it.
Water
In general, it’s probably better not to give your Bromeliad enough water than to give it too much (although obviously, neither is ideal). When the soil is about halfway dry, you should water it. Some Bromeliads, like the well-known Neoregalia, have a tank in the middle where their leaves meet. This tank should be flushed often and can be filled with distilled water.
Humidity
Many of these plants come from places with high humidity, like the tropics. In our dry homes, this can sometimes be a problem. You and your plants might both benefit from a humidifier.
Fertilizer
These plants don’t need much fertilizer because they grow slowly. During the growing season, you can apply diluted liquid plant food a few times in spring and early fall. Stop adding fertilizer in the winter.
Please click the link below to see our other post if you need information on caring for bromeliad plants.
Most Commonly Asked Questions
Can You Grow Bromeliads In Water?
Like air plants, bromeliads die in water. You can grow baby bromeliads from seeds in water. Let the wound heal before you put the branch in the water. It might die if you put the branch in the water too quickly. Use clean water to keep the pH level even. Give your water a weak, balanced fertilizer once a month during the growing season. Instead of getting your plant to grow roots in water, you can grow it hydroponically once it already has roots.
Do All Bromeliads Produce Pups?
No, not all bromeliads produce pups. Pups are a type of offset that some plants produce. Bromeliads typically produce pups from the axils of their leaves, which are the point where the leaf meets the stem. The pups grow from there and eventually develop into new plants. Bromeliads that don’t produce pups usually die after they flower.
How Often Do Bromeliads Produce Pups?
Bromeliads are a type of flowering plant known for producing pups or small offsets of the plant. Bromeliads typically produce pups every 2-3 years, though this can vary depending on the bromeliad species. Some bromeliads will produce pups more frequently, while others may only produce them once every few years.
Do Bromeliads Like Sun Or Shade?
Bromeliads are a type of plant that is native to the tropics. They are known for their brightly colored flowers and ability to grow in both sun and shade. While they tolerate some sun, they prefer to grow in shady areas. This is because they are used to growing in the understory of the rainforest, where there is little direct sunlight. When grown in direct sunlight, bromeliads will often suffer from sunburned leaves.
When Is The Best Time To Repot Your Bromeliad?
It would help if you repotted your BromeliadBromeliad in the spring after the growing season has begun but before it blooms. At this point, it will have the biggest reserves of energy and be able to weather the transition from one pot to another without compromising its growth or blooming.
Final Touch
Bromeliads propagation is a fascinating and rewarding process for plant enthusiasts and gardeners alike. These unique tropical plants, with their diverse varieties and vibrant colors, add a touch of exotic beauty to any space. The two primary methods of propagation – through offsets (pups) and seed germination – offer different challenges and rewards.
While pups provide a quicker and more reliable route to success, seed propagation allows for a greater potential of genetic diversity and hybridization. By understanding the proper care, environmental conditions, and techniques for propagation, gardeners can successfully cultivate and expand their collection of these stunning plants, and contribute to the conservation of these remarkable species.

My name is Md Deloar Hossain and I’m the creator of Club Gardening, designed for all your gardening ideas, gardening product reviews, and a place to help you find the best gardening experience possible.
